本文记录了使用 Redux 和 React 制作找工作APP过程中的一些要点。
1. 准备工作
1.1 快速构建应用
使用create-react-app快速构建单页面应用,具体过程可以参考我的笔记: Redux 搭配 React 完成迷你型任务管理应用 Todo List 。
create-react-app能够让我们省去安装和配置webpack、babel等工作,在此项目中我们需要自定义一些配置,所以需要运行:
1
npm run eject
运行完成后,项目根目录下会新增两个文件夹:config和scripts。
1.2 安装库
此应用使用 Redux 来管理 state 。所以要安装 redux 和 react-redux :
1
yarn add redux react-redux
2. 登陆及注册页面
登录和注册页面如下:
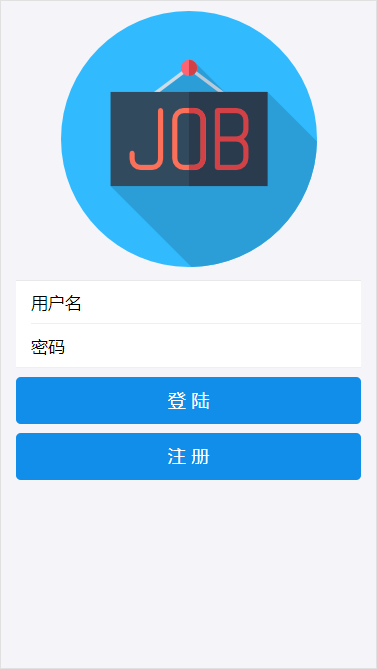
为了实现登陆和注册,我们把工作分为:
- 1) 前端:redux + react + react-router,端口号:3000;
- 2) 后端:nodejs + express,端口号:3030;
- 3) 数据库:mongodb,端口号:27017;
2.1 前端
2.1.1 依赖模块
前端使用的模块有:react-router-dom、redux-thunk、redux-logger、babel-plugin-import、antd-mobile、axios。
- 1) React Router 是一组导航组件,它们与应用程序以声明方式组合。所以我们在写页面之前先安装 react-router-dom:
1
yarn add react-router-dom
导入:
1
import { BrowserRouter as Router, Route, Link } from "react-router-dom";
- 2) 安装中间件:redux-thunk 和 redux-logger:
1
yarn add redux-thunk redux-logger
导入:
1
2
import thunk from 'redux-thunk';
import {createLogger} from 'redux-logger';
- 3) babel-plugin-import
babel-plugin-import 是 babel 的模块化导入插件,兼容 antd,antd-mobile,lodash,material-ui 等。1
yarn add babel-plugin-import --dev - 4) antd-mobile
antd-mobile是一个基于 Preact / React / React Native 的 UI 组件库。1
yarn add antd-mobile
在 package.json 中的
"babel"字段下新增:1 2 3 4 5 6 7 8 9
"plugins": [ [ "import", { "libraryName": "antd-mobile", "style": "css" } ] ]
使用:
1
2
import {Button} from 'antd-mobile';
<Button type="primary">登陆</Button>
- 5) axios
axios 是基于 Promise 的 HTTP 客户端,适用于浏览器和 node.js。
安装:1
yarn add axios
引入:
1
import axios from 'axios';
使用:
1
2
3
4
5
axios.get('/user/info').then((res) => {
  if(res.status === 200) {
      console.log(res.data);
  }
});
注意:App 的服务端口号为
3000,而后端服务的端口号为3030。为了能够在同域名下发送 API 请求,我们需要在package.json中新增"proxy":1 2 3
{ "proxy": "http://localhost:3030" }
这样,前端请求:
axios.get('/user/info')将会被代理到请求:http://localhost:3030/user/info。
官网解释
注:不增加"proxy"字段时,请求地址将会是:http://localhost:3000/user/info。
2.1.2 组件
登陆/注册界面有如下几个组件:
- 1) Login:登陆;
- 2) Register:注册;
- 3) AuthRoute:权限管理;
- 4) Logo: 网站logo。
Tips:
- 1) 组件
AuthRoute主要用来检验用户是否有权限访问当前的url (‘localhost:3000/login’和’localhost:3000/register’无需检验) 。
此外此组件还通过axios.get('/user/info').then((res) => {})获取用户信息,判断用户是否已登录(后端根据通过req.cookies获取的登陆状态,返回不同的json)。 组件AuthRoute中为了能够访问 react-router 的 history/location 属性,从react-router-dom中引入了withRouter:1 2 3 4 5
import {withRouter} from 'react-router-dom'; class AuthRoute extends Component { // AuthRoute组件中能使用this.props.history和this.props.location等。 } export default withRouter(connect(null, mapDispatchToProps)(AuthRoute));
src/index.js中的ReactDOM.render()如下:1 2 3 4 5 6 7 8 9 10 11 12
ReactDOM.render( (<Provider store={store}> <Router> <div> <AuthRoute/> <Route path="/login" component={Login} /> <Route path="/register" component={Register} /> </div> </Router> </Provider>), document.getElementById('root') );
- 2)
Login和Register组件中从react-router-dom引入了Redirect,它能导航到新位置:1 2 3 4 5 6 7 8 9 10
import {Redirect} from 'react-router-dom'; // 使用Redirect render() { return ( <div> {this.props.redirectPath?<Redirect to={this.props.redirectPath} />:null} /*其他操作...*/ </div> ); }
2.1.3 Redux
目前的 state 结构如下:
1
2
3
4
5
6
7
8
9
{
  user: {
    redirectPath: '',// 重定向路径
    isAuth: false,// 是否已登录
    username: '',// 用户名
    type: '',// 用户类型:boss/genius
    msg: ''// 错误信息
  }
}
src/actions/actions.js用来定义 actions 创建函数,src/reducers/user.js用来定义处理 state.user 的 reducer。
2.2 后端
后端的代码中不要使用ES6的import、export和export default语法。
2.2.1 依赖模块
后端使用的模块有:express、body-parser、cookie-parser、mongoose等。
- 1) Express 是基于 Node.js 平台,快速、开放、极简的 Web 开发框架。
安装:1
yarn add express
使用:
1
2
3
4
5
6
7
8
9
10
// server.js
const express = require('express');
const app = express();
app.use('/user', user);
// user.js
const express = require('express');
const router = express.Router();
router.post('/register', (req, res) => {/*...*/});
router.post('/login', (req, res) => {/*...*/});
router.get('/info', (req, res) => {/*...*/});
- 2) body-parser 是解析主体的中间件,后端可以通过 req.body 访问解析后的请求主体。
安装:1
yarn add body-parser
使用:
1
2
3
// server.js
const bodyParser = require('body-parser');
app.use(bodyParser.json());// 使用JSON body parser中间件
- 3) cookie-parser 能解析 HTTP 请求 cookies。使用此中间件后,后端通过 req.cookies 能访问请求发送的 cookie。
注:后端通过res.cookie(name, value [, options])设置 cookie,此方法为 Express 中 Response 对象的方法,与此中间件无关。
安装:1
yarn add cookie-parser
使用:
1
2
3
// server.js
const cookieParser = require('cookie-parser');
app.use(cookieParser()); // 使用cookie-parser中间件
- 4) mongoose 用来连接 mongodb 数据库。
安装:1
yarn add mongoose
使用:
1
2
3
4
5
6
7
8
9
10
11
12
13
14
15
16
17
18
19
20
21
22
23
24
// model.js
const mongoose = require('mongoose');
// 连接mongodb
const DB_URL = 'mongodb://127.0.0.1:27017/job-hunting';
mongoose.connect(DB_URL, { useNewUrlParser: true });
// 定义一个Model
mongoose.model(
  'user', // 对应mongodb中的collection名称
  new mongoose.Schema({
    username: {type: String, required: true},
    pwd: {type: String, required: true},
    type: {type: String, required: true},
    //头像
    avatar:{'type':String},
  })
);
// 访问一个Model
const User = mongoose.model('user');
// 查询数据
User.findOne({}, (err,doc) => {});
// 插入数据
// 我们把Model的实例称为一个document,它是与MongoDB中数据一一对应的映射。
const instance = new User({username, pwd, type});
instance.save((err, product) => {});
注:数据库中的 collection 名称会自动使用 user 的复数,即users。
2.3 mongodb
2.3.1 安装和启动
- 1) 安装 mongodb 数据库后,启动数据库:
1
mongod -dbpath F:/Database/mongodb/myproject - 2) 打开一个新的CMD,连接服务:
1
mongo
如果成功,会提示:
1
connecting to: mongodb://127.0.0.1:27017
2.3.2 常用操作
mongodb 中不需要手动创建集合,insert 数据时,若不存在此集合,会自动创建集合。
show dbs:查看所有数据库列表;use dbName:使用/创建数据库;show collections:查看所有集合;db.dropDatabase():删除当前数据库;db.COLLECTION_NAME.drop():删除指定集合;db.COLLECTION_NAME.insert({"name": "nxj"}):插入数据;db.COLLECTION_NAME.find({"name": "nxj"}):查找数据;db.COLLECTION_NAME.update({"name": "nxj"}, {$set:{"age": 20}}):更新数据;db.COLLECTION_NAME.remove({"name": "nxj"}):删除数据。
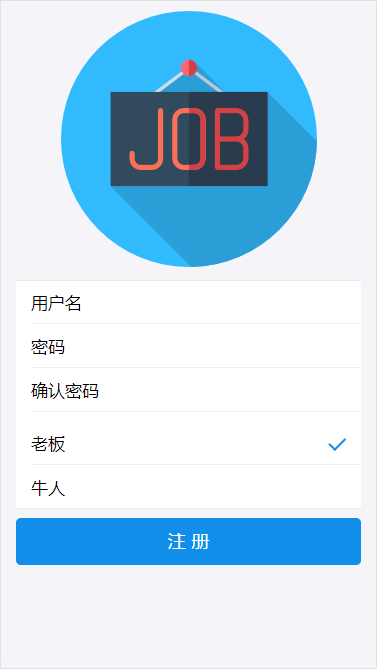
3. 完善信息页面
完善信息页面如下:

3.1 前端
新建组件如下:
- 1)
BossInfo:Boss 完善信息页面; - 2)
GeniusInfo:牛人完善信息页面; - 3)
AvatarSelector:选择头像的组件。
在src/index.js中使用了组件BossInfo和GeniusInfo:
1
2
3
4
5
6
7
8
9
10
11
12
13
14
ReactDOM.render(
    (<Provider store={store}>
        <Router>
            <div>
                <AuthRoute/>
                <Route path="/boss-info" component={BossInfo}/>
                <Route path="/genius-info" component={GeniusInfo}/>
                <Route path="/login" component={Login} />
                <Route path="/register" component={Register} />
            </div>
        </Router>
    </Provider>),
    document.getElementById('root')
);
在完善信息页面中填完信息后,点击保存按钮将 dispatch 一个异步 action :update(info) 。
如BossInfo组件中:
1
2
3
4
5
6
7
8
9
10
11
12
13
14
15
16
17
18
19
20
21
22
23
24
// boss-info.js
class BossInfo extends Component {
    // 省略...
    render(){
        const currPath = this.props.location.pathname;// 当前路径
        const redirect = (this.props.redirectPath && (this.props.redirectPath !== currPath));// 是否需要跳转
        return (<div>
            {redirect ? <Redirect to={this.props.redirectPath}/> : null}
            {/*省略...*/}
            <Button type="primary" onClick={() => this.props.updateInfo(this.state)}>保存</Button>
        </div>)
    }
}
const mapStateToProps = state => {
    return {
        redirectPath: state.user.redirectPath
    }
};
const mapDispatchToProps = dispatch => {
    return {
        updateInfo: info => dispatch(update(info))
    }
};
export default connect(mapStateToProps,mapDispatchToProps)(BossInfo);
注:{redirect ? <Redirect to={this.props.redirectPath}/> : null}是为了实现点击保存按钮后由/boss-info至/boss的跳转。
actions.js中定义的异步 action : update()中使用 POST 方法向后端传输信息:
1
2
3
4
5
6
7
8
9
10
11
12
13
// Thunk(返回一个函数): 更新用户信息
export function update(info){
    return dispatch => {
        axios.post('/user/update', info)
            .then(res => {
                if(res.status === 200 && res.data.code === 0){
                    dispatch(authSuccess(res.data.info));//更新成功
                }else {
                    dispatch(errMsg(res.data.msg));//更新失败
                }
            }).catch(err => console.log(err));
    }
}
3.2 后端
后端接收到信息后,将其保存到 mongodb 数据库中。
server/user.js:
1
2
3
4
5
6
7
8
9
10
11
12
13
14
15
16
17
18
19
20
21
22
23
24
25
// 处理更新用户信息: axios.post('/user/update', {})
router.post('/update', (req, res) => {
    // 获取cookie中的_id,判断用户是否已登录
    if(req.cookies && req.cookies._id){
        // 已登录
        const _id = req.cookies._id;
        console.log('_id: '+_id);
        User.findOneAndUpdate({_id}, req.body, (err, doc) => {
            if(err){
                res.json({code: 1, msg: '后端错误!'});
            }else{
                console.log(doc);
                doc.pwd = null;
                // doc为插入数据前,在数据库中查找到的数据
                const info = Object.assign({}, {type: doc.type}, req.body);
                // 注意:不要直接复制doc,因为会复制doc中其他不需要的可枚举属性。
                // const info = Object.assign({}, doc, req.body);
                res.json({code: 0, info: info});
            }
        });
    } else {
        // 未登录,_id不存在
        res.json({code: 1, msg: '无登陆信息'});
    }
});
注:Model.findOneAndUpdate(conditions, update, callback)的回调函数 callback 中的参数 doc 为数据库中更新前的数据,所以返回 json 时,要和 req.body (要保存的信息) 一起返回:
1
const info = Object.assign({}, {type: doc.type}, req.body);
其中我们没有直接复制 doc :const info = Object.assign({}, doc, req.body);,原因是:
如果直接复制 doc,我们会发现 doc.type 等,实际是保存在 doc._doc.type 中的。
(不使用 Object.assign ,直接返回 doc :res.json({code: 0, info: doc});则不会出现此情况。)
我们只需要 doc.type 属性来更新 state.user.redirectPath 的值,实现点击保存后由/boss-info至/boss的跳转。
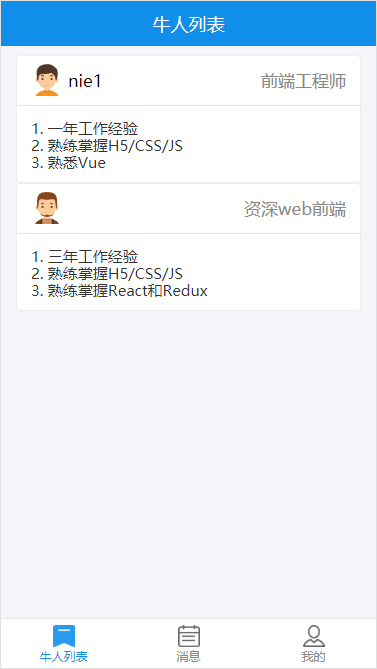
4. 牛人列表和Boss列表
4.1 前端
Boss 用户完善信息后,会看到牛人列表;而牛人用户完善信息后,会看到 Boss 列表: 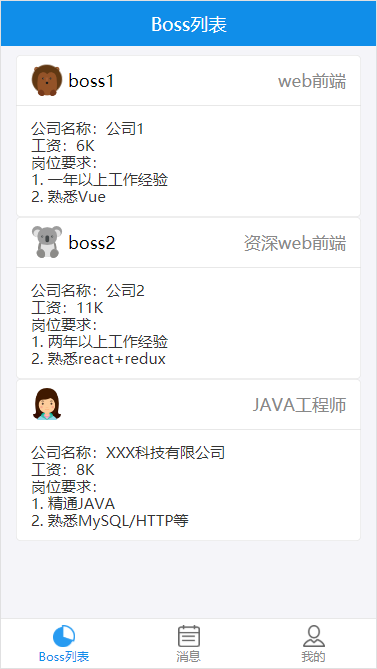
新增组件有:
- 1)
Dashboard:上图所示的界面; - 2)
NavLink:底部导航栏; - 3)
Boss:Boss 页面,显示牛人列表; - 4)
Genius:牛人页面,显示 Boss 列表; - 5)
UserList:列表;
src/index.js中的render():
1
2
3
4
5
6
7
8
9
10
11
12
13
14
15
16
17
ReactDOM.render(
    (<Provider store={store}>
        <Router>
            <div>
                <AuthRoute/>
                <Switch>
                    <Route path="/boss-info" component={BossInfo}/>
                    <Route path="/genius-info" component={GeniusInfo}/>
                    <Route path="/login" component={Login} />
                    <Route path="/register" component={Register} />
                    <Route component={Dashboard} />
                </Switch>
            </div>
        </Router>
    </Provider>),
    document.getElementById('root')
);
其中react-router中的<Switch></Switch>表示:渲染和location匹配的第一个<Route>或<Redirect>。其余的不会被渲染。
Dashboard组件在 componentDidMount 阶段会向后端请求用户列表:
- Boss 用户:获取牛人列表;
- 牛人用户:获取 Boss 列表。
1
2
3
4
5
6
7
8
9
10
11
12
13
14
15
16
17
class Dashboard extends Component {
    componentDidMount () {
        this.props.getList();// 后端根据_id获取type
    }
    // 省略...
}
const mapStateToProps = state => {
    return {
        type: state.user.type
    };
};
const mapDispatchToProps = dispatch => {
    return {
        getList: () => dispatch(getChatList())
    }
};
export default withRouter(connect(mapStateToProps, mapDispatchToProps)(Dashboard));
其中异步action:getChatList()在actions-chatList.js中的定义如下:
1
2
3
4
5
6
7
8
9
10
11
12
13
14
15
16
// 省略 getChatListSuccess()/getChatListFailed...
// Thunk(返回一个函数): 获取聊天用户列表
export function getChatList(){
    return dispatch => {
        axios.get('/user/list')
            .then(res => {
                if(res.status === 200 && res.data.code === 0){
                    //获取成功
                    dispatch(getChatListSuccess(res.data.chatList));
                }else {
                    //获取失败
                    dispatch(getChatListFailed(res.data.msg));
                }
            }).catch(err => console.log(err));
    }
}
NavLink组件中使用了antd-mobile中的TabBar:
1
2
3
4
5
6
7
8
9
10
11
12
13
14
15
16
17
18
render() {
    const Item = TabBar.Item;
    const currPath = this.props.location.pathname;
    return (
        <TabBar>
            {this.props.filteredNavList.map((item, index) => (
                <Item
                    key={index}
                    title={item.title}
                    icon={ {uri: require(`./icons/${item.icon}.png`)} }
                    selectedIcon={ {uri: require(`./icons/${item.icon}-active.png`)} }
                    selected={currPath === item.path}
                    onPress={() => this.props.history.push(item.path)}
                />))
            }
        </TabBar>
    );
}
其中使用了onPress={() => this.props.history.push(item.path)}来实现点击 Item 跳转至相应的路由。
4.2 后端
后端服务器在收到前端的axios.get('/user/list')请求后,根据 cookie 中的 _id 验证用户是否已登录。若已登录,则根据用户的 type 属性,返回相应的用户列表:
- 为
type: 'boss'用户返回所有type: 'genius'的用户; - 为
type: 'genius'用户返回所有type: 'boss'的用户。
1
2
3
4
5
6
7
8
9
10
11
12
13
14
15
16
17
18
19
20
21
22
23
24
25
26
27
28
29
30
31
32
33
34
35
// 处理请求信息:axios.get('/user/list')
router.get('/list', (req, res) => {
    // 获取cookie中的_id
    if(req.cookies && req.cookies._id){
        const _id = req.cookies._id;
        console.log('_id: '+_id);
        User.findOne({_id}, (err, doc) => {
            if(err){
                res.json({code: 1, msg: '后端错误!'});
                return;
            }
            if(doc){
                // 找到与_id对应的用户信息
                // let type = req.query.type;// BUG: 第一次加载有值,刷新时没有值
                let type = doc.type;// 用户的类型
                console.log('type = ', type);
                type = (type==='boss') ? 'genius' : 'boss';
                User.find({type}, (err, doc) => {
                    if(err){
                        res.json({code: 1, msg: '后端错误!'});
                        return;
                    }
                    res.json({code: 0, chatList: doc});
                });
            }else{
                // 未找到与_id对应的用户信息
                res.clearCookie('_id');// 删除cookie
                res.json({code: 1, msg: '未找到跟_id对应的用户信息'});
            }
        })
    } else {
        // cookies不存在
        res.json({code: 1, msg: '无cookies信息'});
    }
});
5. 个人信息页面
5.1 前端
个人信息页面如下图:
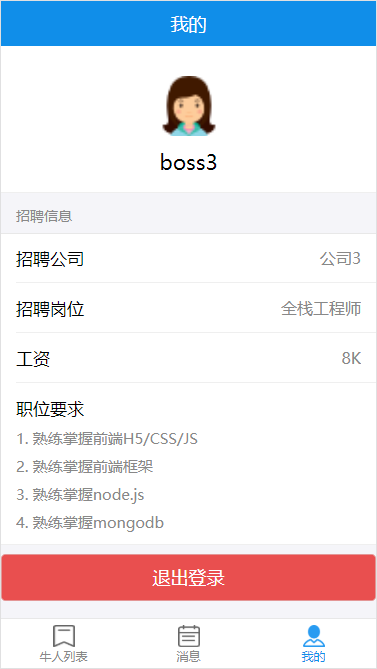
点击页面底部的退出登录按钮后,会 dispatch 一个异步 action :logout():
src/actions/actions-user.js:
1
2
3
4
5
6
7
8
9
10
11
12
13
14
15
16
// 退出登录成功
function logoutSuccess(msg){
    return {
        type: LOGOUT_SUCCESS,
        msg
    };
}
// Thunk(返回一个函数): 退出登录
export function logout() {
    return dispatch => {
        axios.get('/user/logout')
            .then(res => {
            dispatch(logoutSuccess(res.data.msg));
            });
    }
}
5.2 后端
后端接收到前端'/user/logout'的 GET 请求后,删除 cookies 中的 _id:
server/user.js:
1
2
3
4
5
// 处理登出请求:axios.get('/user/logout')
router.get('/logout', (req, res) => {
    res.clearCookie('_id');// 删除cookie
    res.json({code: 0, msg: '已退出登录'});
});
5.3 Tips
5.3.1 装饰器 @
- 1) 安装插件
babel-plugin-transform-decorators-legacy:1
yarn add babel-plugin-transform-decorators-legacy --dev - 2) 在 package.json 中的
"babel"字段下的"plugins"数组中新增"transform-decorators-legacy":1 2 3 4 5 6 7 8 9 10 11 12 13 14 15
"babel": { "presets": [ "react-app" ], "plugins": [ [ "import", { "libraryName": "antd-mobile", "style": "css" } ], "transform-decorators-legacy" ] }
设置完成后我们就可以使用装饰器@了。
- 使用装饰器前:
1
2
3
4
5
6
7
8
9
10
11
12
class My extends Component {/*省略...*/}
const mapStateToProps = state => {
  return {
      user: state.user
  }
};
const mapDispatchToProps = dispatch => {
  return {
      logout: () => dispatch(logout())
  }
};
export default connect(mapStateToProps, mapDispatchToProps)(My);
- 使用装饰器后:
1
2
3
4
5
6
7
8
9
10
11
12
13
14
@connect(
  state => {
      return {
          user: state.user
      }
  },
  dispatch => {
      return {
          logout: () => dispatch(logout())
      }
  }
)
class My extends Component {/*省略...*/}
export default My;
5.3.2 高阶组件(初级)
Login和Register组件中都有一个函数:handleChange,当输入框中的值发生变化时,调用此函数来更新 state 中相应的值。
1
2
3
4
5
handleChange (key, value){
    this.setState({
        [key]: value
    });
}
我们可以新建一个简单的高阶组件 handleChange 代理 state 和 handleChange:
1
2
3
4
5
6
7
8
9
10
11
12
13
14
15
16
17
18
19
import React, {Component} from 'react';

export default function handleChange(Comp){
    return class HandleChangeComp extends Component {
        constructor(props){
            super(props);
            this.state={};
            this.handleChange=this.handleChange.bind(this);
        }
        handleChange(key, value) {
            this.setState({
                [key]: value
            });
        }
        render () {
            return <Comp handleChange={this.handleChange} state={this.state} {...this.props} />;
        };
    }
}
要点:
- 1) 此高阶组件中传入一个组件
Comp作为参数; - 2) 新建一个组件
HandleChangeComp并导出; - 3)
HandleChangeComp的 render() 中返回Comp,并把自己的handleChange和state传递给Comp; - 4) 传递给
HandleChangeComp的属性全部展开后,传给Comp:{...this.props}
组件 Login 中使用此高阶组件:
- 1) 引入组件
handleChange:1
import handleChange from '../../components/handle-change/handle-change';
- 2) 使用装饰器@:
1
2
3
@handleChange
@connect(/*省略...*/)
class Login extends Component {/*省略...*/}
- 3) 删除
handleChange()函数的定义和constructor()中 state 的初始化this.state={}; - 4)
this.handleChange改成this.props.handleChange,this.state改成this.props.state。
6. 聊天界面
在 Boss 列表或者牛人列表,点击用户会进入聊天页面。

6.1 Socket
为了实现实时通讯,我们使用了socket.io和socket.io-client两个库,分别供后端和前端使用。
A 用户给服务器发送一条 data 数据,服务器收到后根据 data 中的 toUserID 属性,把消息发给指定的 B 用户。聊天流程如下:
用户A –> 服务器 –> 用户B
6.1.1 socket.io
后端使用 socket.io库。
- 1) 后端配合Express使用。
1
2
3
4
5
6
7
8
9
10
11
12
/* 省略... */
const app = express();
// 配置socket.io (work with express)
let server = require('http').createServer(app);
const io = require('socket.io')(server);
handleChat(io);// 自定义模块:用于实现实时通讯
// 配置结束
let _server = server.listen(3030, '192.168.8.103', () => {
  const host = _server.address().address;
  const port = _server.address().port;
  console.log('http://%s:%s', host, port);
});
- 2)
handleChat.js模块主要用于接收客户端 A 的消息,然后把消息存储在 mongodb 数据库中,最后把此消息发给客户端 B 。1 2 3 4 5 6 7 8 9 10 11 12 13 14 15 16 17 18 19 20 21 22 23 24 25 26 27 28 29 30 31 32 33 34 35 36 37 38 39 40 41 42 43 44 45 46
// 自定义库 const getModel = require('./model'); const Chat = getModel('chat'); function handleChat(io){ const socketsOnline = {}; io.on('connection', function(socket){ // 监听上线 console.log('有用户连接...'); socket.on('online', function(userID){ socket.userID = userID;// 给socket增加一个"userID"属性 console.log(`用户${socket.userID}上线了。`); if(!socketsOnline[userID]) { socketsOnline[userID] = socket; } console.log("在线用户:", Object.getOwnPropertyNames(socketsOnline)); }); // 监听下线 socket.on('disconnect', function() { if(socketsOnline[socket.userID]) { delete socketsOnline[socket.userID]; console.log(`用户${socket.userID}断开连接。`); } console.log("在线用户:", Object.getOwnPropertyNames(socketsOnline)); }); // 监听客户端A发来的消息 socket.on('send-msg', function(data){ // 把信息存储在mongodb数据库中 const instance = new Chat(data); instance.save((err, product) => { if(err){ console.log('存储消息失败'); } else { // 给指定客户端B发送信息 if(socketsOnline[data.toUserID]) { console.log('=== 发送消息 ==='); const id = socketsOnline[data.toUserID].id; io.sockets.connected[id].emit('receive-msg', data); } } }); }); }); } module.exports = handleChat;
重点:
- 常量
socketsOnline用来存储与服务器连接的 sockets :1
const socketsOnline = {};
- 监听客户端的连接:
1
2
3
 io.on('connection', function(socket){
  /*socket为与客户端的socket连接*/
 })
- 监听 online 事件(把当前已连接的 socket 添加至 socketsOnline 中):
1
2
3
4
5
 socket.on('online', function(userID){
  socket.userID = userID;// 给socket增加一个"userID"属性
  // 省略...
  socketsOnline[userID] = socket;
 })
- 接收客户端发来的消息(监听 send-msg 事件):
1
 socket.on('send-msg', function(data){})
data的格式为:
1
2
3
4
5
6
7
8
 let data =
 {
 fromUserID: "5ba32ad5c27da41d58bbcd27",
 isRead: false,
 relevantUsers: "5ba32a0844ef6524e4124ab3_5ba32ad5c27da41d58bbcd27",
 text: "你好,我在找工作,能聊聊吗?",
 toUserID: "5ba32a0844ef6524e4124ab3",
 }
- 监听客户端的断开连接(把当前已连接的 socket 从 socketsOnline 中移除):
1
2
3
4
 socket.on('disconnect', function(){
  // 省略...
  delete socketsOnline[socket.userID];
 })
- 给指定用户发送消息:
1
2
 const id = socketsOnline[data.toUserID].id;
 io.sockets.connected[id].emit('receive-msg', data);
- 常量
6.1.2 socket.io-client
前端使用socket.io-client库。
- 连接服务器:
1
2
import io from 'socket.io-client';
socket = io('ws://192.168.8.103:3030');// 连接服务器
- 向服务器发送消息
1
2
3
4
5
6
7
8
9
10
11
12
// 发送信息事件
const data =  {
  fromUserID: "5ba32ad5c27da41d58bbcd27",
  isRead: false,
  relevantUsers: "5ba32a0844ef6524e4124ab3_5ba32ad5c27da41d58bbcd27",
  text: "你好,我在找工作,能聊聊吗?",
  toUserID: "5ba32a0844ef6524e4124ab3",
};
socket.emit('send-msg', data);
// 上线事件
const fromUserID = '5ba32ad5c27da41d58bbcd27';
socket.emit('online', fromUserID);
- 接收服务器发来的消息
1
2
3
socket.on('receive-msg', function(data){
  dispatch(msgReceived(data));
});
6.2 前端
6.2.1 Chat 组件
新建 Chat 组件,然后在src/index.js中的 Switch 标签中添加 Route 元素:
1
<Route path="/chat/:chatWith" component={Chat} />
注意 path 中的:chatWith,我们可以在 Chat 组件中通过 chatWith 获取 URL 中/chat/后面的字符串 (即接收信息的用户ID)。
1
2
3
4
5
6
7
8
9
10
11
12
13
14
15
16
17
18
ReactDOM.render(
    (<Provider store={store}>
        <Router>
            <div>
                <AuthRoute/>
                <Switch>
                    <Route path="/boss-info" component={BossInfo}/>
                    <Route path="/genius-info" component={GeniusInfo}/>
                    <Route path="/login" component={Login} />
                    <Route path="/register" component={Register} />
                    <Route path="/chat/:chatWith" component={Chat} />
                    <Route component={Dashboard} />
                </Switch>
            </div>
        </Router>
    </Provider>),
    document.getElementById('root')
);
给 UserList 组件中的 Card 标签添加 onClick 事件,实现点击用户后,跳转至聊天界面:
1
2
3
4
<Card
    key={index}
    onClick={() => {this.props.history.push(`/chat/${item._id}`)}}
>
其中item._id为被点击用户的 ID ,在 Chat 组件中,我们可以通过chatWith获取到此用户的 ID :
1
const toUserID = this.props.match.params.chatWith;// 接收消息的ID
6.2.2 cookies中的_id
我们刷新页面时,state 会初始化,某些组件会 dispatch 异步 action 取获数据,如AuthRoute组件中:
1
2
3
4
5
6
7
8
9
10
11
axios.get('/user/info').then((res) => {
    // 判断是否已登陆
    if(res.status === 200 && res.data.code === 0) {
        // 已登录:dispatch来获取后端传过来的信息
        this.props.loadInfo(res.data.info);
    } else {
        // 未登录:跳转至登陆页面
        // console.log(this.props);// {match: {…}, location: {…}, history: {…}, staticContext: undefined}
        this.props.history.push('/login');// 跳转至登陆页面
    }
});
由于获取数据的过程是异步的,所以其他组件通过this.props获取 state 中的值时,可能仍为初始值。
而这些组件会根据这些值做一些重要的操作,如Chat组件会根据 this.props.user_id 连接服务器:
1
2
const fromUserID = this.props.user._id;// 发送消息的ID
this.props.receiveMsg(fromUserID);
actions/actions-chat.js 中receiveMsg的定义如下:
1
2
3
4
5
6
7
8
9
10
export function receiveMsg(fromUserID) {
    return dispatch => {
        dispatch({type: CHAT_ONLINE});
        socket = io('ws://192.168.8.103:3030');// 连接服务器
        socket.emit('online', fromUserID);// 上线
        socket.on('receive-msg', function(data){
            dispatch(msgReceived(data));
        });
    };
}
其中socket.emit('online', fromUserID);会把fromUserID发给后端服务器注册:
server/handleChat.js中:
1
2
3
4
5
6
7
8
9
const socketsOnline = {};
io.on('connection', function(socket){
    socket.on('online', function(userID){
        socket.userID = userID;// 给socket增加一个"userID"属性
        if(!socketsOnline[userID]) {
            socketsOnline[userID] = socket;
        }
    });
})
为了防止注册时 this.props.user._id 为空值的情况,我们定义了函数 getCookie ,用于取出保存在本地的 cookies 中的 _id:
common/js/util.js中:
1
2
3
4
5
6
7
8
9
10
11
12
13
14
15
16
17
18
19
20
21
22
23
export function getCookie(name){
    const cookieName = encodeURIComponent(name) + "=";
    let cookieValue = '';
    let locStart = document.cookie.indexOf(cookieName);
    if(locStart > -1){
        let locEnd = document.cookie.indexOf(';', locStart);
        if(locEnd === -1){
            locEnd = document.cookie.length;// 最后一个键值对
        }
        cookieValue = decodeURIComponent(document.cookie.substring(locStart + cookieName.length, locEnd));
        // 后端使用了cookie-paerser后,会有'j:'前缀: j:"5ba32ad5c27da41d58bbcd27"
        cookieValue = fixedCookieValue(cookieValue);
    }
    return cookieValue;
}
function fixedCookieValue(cookieValue){
    // 后端使用了cookie-paerser后,会有'j:'前缀: j:"5ba32ad5c27da41d58bbcd27"
    let locStart = cookieValue.indexOf('j:"');
    if(locStart > -1){
        cookieValue = cookieValue.substring(3, cookieValue.length - 1);
    }
    return cookieValue;
}
reducers/user.js中,定义初始化的 initState 时,使用 _id: getCookie('_id')替代_id: '':
1
2
3
4
5
6
7
8
import {getCookie} from '../common/js/util';
const initState = {
    redirectPath: '',
    username: '',
    type: '',
    msg: '',
    _id: getCookie('_id')
};
6.3 后端
除了 6.1.1 socket.io 中处理实时聊天的模块外,我们还需要在server/user.js中处理两个前端的请求:
- 获取聊天信息:
axios.get('/user/msg-list'); - 把消息设为已读:
axios.post('/user/read-msg',{fromUserID, toUserID});1 2 3 4 5 6 7 8 9 10 11 12 13
// 处理获取聊天信息请求:axios.get('/user/msg-list') router.get('/msg-list', (req, res) => { const _id = req.cookies._id; // 省略... Chat.find({'$or': [{fromUserID: _id}, {toUserID: _id}]}, (err, doc) => { if(err){ res.json({code: 1, msg: '后端错误!'}); return; } res.json({code: 0, chatmsgs: doc}); }) // 省略... });
1
2
3
4
5
6
7
8
9
10
11
12
// axios.post('/user/read-msg',{fromUserID, toUserID})
router.post('/read-msg', (req, res) => {
  const {fromUserID, toUserID} = req.body;
  Chat.updateMany({fromUserID: toUserID, toUserID: fromUserID}, {$set: {isRead: true}}, (err, doc)=>{
      // 筛选条件颠倒,是为了把对方发给自己的消息设为已读
      if(err){
          res.json({code:1, msg: '设置消息为已读失败'});
          return;
      }
      res.json({code:0, msg: '设置消息为已读成功'});
  });
});
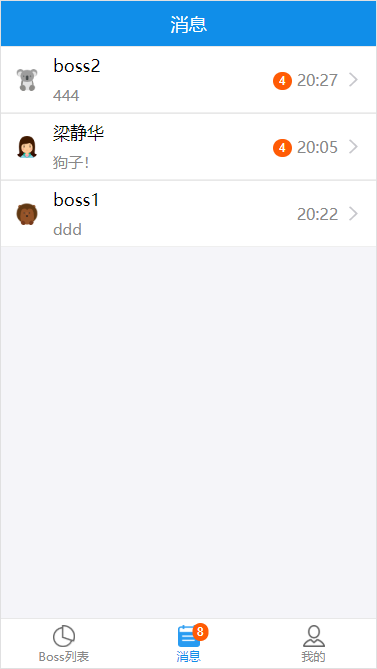
7. 消息页面
消息页面中显示了给当前用户发送了消息的其他用户,未读消息和最近消息的优先级别最高。
7.1 前端
新建 Message 组件,组件接收 state 中的两个数组:
state.chat.chatmsgs:聊天信息数组;state.chaList.list:所有可聊天的用户数组。
从state.chat.chatmsgs中筛选出其他用户发来的消息,按用户进行分类:
组件中的 render() 函数:
1
2
3
4
5
6
7
8
9
render() {
    const msgList = this.props.chat.chatmsgs;
    const userList = this.props.chatList.list;
    return (
        <div>
            {(msgList && userList) ? this.sortMessage(msgList, userList) : ''}
        </div>
    );
}
组件中的 sortMessage() 函数:
1
2
3
4
5
6
7
8
9
10
11
12
13
14
15
16
17
18
19
20
21
22
23
24
25
26
27
28
29
30
31
32
33
34
35
36
37
38
39
40
41
sortMessage(msgList, userList){
    if(msgList.length === 0 || userList.length === 0) {
        return null;
    }
    const fromUserID = this.props.user._id;
    // 筛选出别人发给自己的消息
    const toMsgList = msgList.filter(list => list.fromUserID !== fromUserID);
    // 按发送用户分类
    const msg = {};// { id: [{消息1},{消息2}] }
    toMsgList.forEach(list => {
        if(!msg[list.fromUserID]){
            msg[list.fromUserID] = [];
        }
        msg[list.fromUserID].push(list);
    });
    // 根据消息是否全部已读分类
    const msgUserList = Object.getOwnPropertyNames(msg);
    const readMsgUserList = [];
    const unreadMsgUserList = [];
    msgUserList.forEach(user => {
        const isAllRead = msg[user].every(msg => {
            return msg.isRead;
        });
        if(isAllRead){
            readMsgUserList.push(user);
        } else {
            unreadMsgUserList.push(user);
        }
    });
    // 重新排序,新消息显示在上面
    const compare = (preID, nextID) => {
        return this.getLastMsg(msg[nextID]).createTime - this.getLastMsg(msg[preID]).createTime;
    };
    readMsgUserList.sort(compare);
    unreadMsgUserList.sort(compare);
    // 渲染
    return (<div>
        {this.renderMessage(unreadMsgUserList, msg, userList)}
        {this.renderMessage(readMsgUserList, msg, userList)}
    </div>)
}
组件中的 renderMessage() 函数:
1
2
3
4
5
6
7
8
9
10
11
12
13
14
15
16
17
18
19
20
renderMessage(msgList, msg, userList,) {
    return msgList.map(id => {
        return (
            <List key={id}>
                <Item
                    arrow="horizontal"
                    thumb={this.getUser(id, userList).avatar}
                    extra={<div>
                        {<Badge style={ {marginRight: '5px'} } text={this.countUnread(msg[id])}/>}
                        {this.getTime(this.getLastMsg(msg[id]).createTime)}
                    </div>}
                    onClick={() => this.props.history.push(`/chat/${id}`)}
                >
                    {this.getUser(id, userList).username}
                    <Brief>{this.getLastMsg(msg[id]).text}</Brief>
                </Item>
            </List>
        );
    });
}
其他函数:
1
2
3
4
5
6
7
8
9
10
11
12
13
14
15
16
17
18
19
20
21
22
23
24
25
26
27
28
29
30
31
32
33
34
35
36
getTime(createTime){
    function fixedPre(num, pre){
        return ('000000000' + num).slice(-pre);
    }
    const CreateDate = new Date(createTime);
    const now = new Date();
    if(now.getDay() !== CreateDate.getDay()){
        return fixedPre(CreateDate.getFullYear(), 4) + '/'
            + fixedPre((CreateDate.getMonth()+1), 2) + '/'
            + fixedPre(CreateDate.getDate(), 2);
    } else {
        return fixedPre(CreateDate.getHours(), 2) + ':'
            + fixedPre(CreateDate.getMinutes(), 2);
    }
}
getLastMsg(msgList){
    return msgList[msgList.length - 1];
}
countUnread(msgList) {
   let count = 0;
   msgList.forEach(msg => {
       if(!msg.isRead){
           count ++;
       }
   });
   return count;
}
getUser(_id, userList) {
    let res = null;
    userList.forEach(list => {
        if (_id === list._id){
            res = list;
        }
    });
    return res;
}
其中,getTime() 函数中定义的 fixedPre() 函数用于给数字前补零。
8. 打包编译
8.1 yarn build
运行yarn build后,项目所在目录下会新生成一个build文件夹:
1
2
3
4
5
6
7
8
9
10
11
build
├── static
|   ├── css
|   |   ├── main.79d10c89.css
|   |   └── main.79d10c89.css.map
|   └── js
|       ├── main.cddeff23.js
|       └── main.cddeff23.js.map
├── asset-manifest.json
├── index.html
└── service-worker.js
其中index.html中会引入打包好的css文件和js文件:
1
<link href="/static/css/main.79d10c89.css" rel="stylesheet">
1
<script type="text/javascript" src="/static/js/main.cddeff23.js"></script>
8.2 修改server/server.js
在开发阶段,我们通过localhost:3000访问前端页面,通过localhost:3030访问服务端。
为了能够在打包编译后,通过localhost:3030也能访问前端页面,我们需要修改server/server.js文件:
1
2
3
4
5
6
7
8
9
10
11
12
// 省略...
// build完成后新增配置
app.use(express.static(path.resolve('./build')));// 托管 build 目录下的文件
app.use((req, res, next) => {
    console.log(req.url);
    const reg = /^\/user|\/static/;// 判断请求URL是否以 /user 或 /static 开头
    if(reg.test(req.url)) {
        return next();
    }
    return res.sendFile(path.resolve('./build/index.html'));// path.resolve() 会把一个路径或路径片段的序列解析为一个绝对路径。
});
// 省略...
重点:
- 1) 托管 build 目录下的文件:
1
app.use(express.static(path.resolve('./build')));// 托管 build 目录下的文件
托管后,
index.html中就能正确地获取静态文件了。比如:1
<link href="/static/css/main.79d10c89.css" rel="stylesheet">
就能正确地获取
build/static/css/main.79d10c89.css文件。 - 2) 判断请求URL是否以 /user 或 /static 开头,如果不是,则返回
build/index.html文件:1
const reg = /^\/user|\/static/;// 判断请求URL是否以 /user 或 /static 开头
- 3)
path.resolve()会把一个路径或路径片段的序列解析为一个绝对路径。如果没有传入参数,则返回当前工作目录的绝对路径。 - 4)
'./build'表示当前目录下的build文件夹,其中当前目录为job-hunting文件夹(见8.3)。
8.3 修改package.json
server.js文件在job-hunting/server文件夹中,为了使server.js运行时,当前路径为job-hunting文件夹,在package.json中的"scripts"字段中新增"server":
1
2
3
4
5
6
  "scripts": {
    "start": "node scripts/start.js",
    "build": "node scripts/build.js",
    "test": "node scripts/test.js --env=jsdom",
    "server": "nodemon server/server"
  }
8.4 访问打包后的应用
在job-hunting目录下运行:
1
yarn server
然后再浏览器中访问http://192.168.8.103:3030。