此篇博客是学习《CSS 揭秘》一书的学习笔记。
1. 自适应布局
众所周知,如果不给元素指定一个具体的 height ,它就会自动适应其内容的高度。
我们如何才能让 width 也具有类似的行为呢?
HTML
1
2
3
4
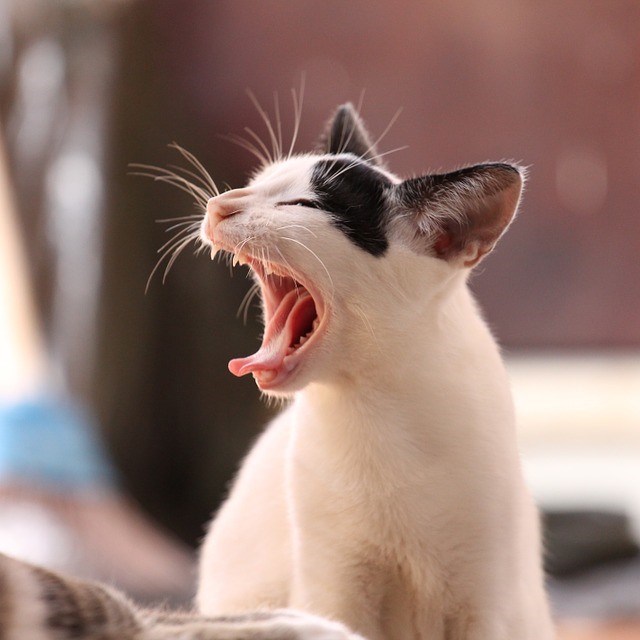
<figure class="self-adaption-7-1">
<img src="/images/2019-06-01-css-secrets/cat.jpg" />
<figcaption><b>min-content size</b>: The smallest size a box could take that doesn’t lead to overflow that could be avoided by choosing a larger size.</figcaption>
</figure>
现在我们希望 <figure> 元素(实线方框)的宽度跟它所包含的图片一样宽。
效果如下:
CSS
1
2
3
4
5
6
7
.self-adaption-7-1.step1 {
  max-width: 300px; /* 回退样式 */
  max-width: min-content;
}
.self-adaption-7-1.step1 > img {
  max-width: inherit;/* 重要 */
}
注:
min-content将解析为这个容器内部最大的不可断行元素的宽度,即最宽的单词、图片或具有固定宽度的盒元素。max-width: 300px;为回退样式,当浏览器无法解析min-content时,此属性将生效。- 给 img 元素设置
max-width: inherit;来继承父元素的max-width。如果 figure 的尺寸由内部元素决定时,此属性不会生效。
此外,由于网页公共样式img {max-width: 100%:}的影响,如果不设置max-width: inherit;,<figure>元素的宽度将变为最宽文字的宽度,且图片会被缩小至此宽度。
2. 根据兄弟元素的数量来设置样式
在某些场景下,我们需要根据兄弟元素的总数来为它们设置样式。
我们可以使用 :only-chid 伪类来选择只有一个列表项的情况。试着拖动滑块增加元素的数量看看效果吧。
CSS
1
2
3
4
5
6
li {
  apacity: .65;
}
li:only-child {
  opacity: 1;
}
实际上,:only-child 等效于 :first-child:last-child,因为如果既是第一项又是最后一项,那说明列表只有一项。
而 :last-child 相当于 :nth-last-child(1)。因此我们可以通过 :first-child:nth-last-child(4) 来命中总数为 4 的列表中的第一项。
CSS
1
2
3
.sibling-count-7-2.demo2 li:first-child:nth-last-child(4){
  opacity: 1;
}
最后在结合兄弟选择符 ~ 选择另外三个选项:
CSS
1
2
3
4
.sibling-count-7-2.demo3 li:first-child:nth-last-child(4),
.sibling-count-7-2.demo3 li:first-child:nth-last-child(4) ~ li {
  opacity: 1;
}
根据兄弟元素的数量范围来匹配元素
:nth-child() 中可以使用 an+b 表达式。这里 n 表示一个变量,可取 0 和正整数。如 :nth-child(n+3) 会选中第三项及以后的项。
利用这个技巧,我们可以选中至少包含四项的所有列表项。
CSS
1
2
3
4
5
.sibling-count-7-2.demo5 li:first-child:nth-last-child(n+4),
.sibling-count-7-2.demo5 li:first-child:nth-last-child(n+4) ~ li {
  /* 命中至少包含四项的所有列表 */
  opacity: 1;
}
使用 -n+6 可以选中最多包含六项的所有列表项。
CSS
1
2
3
4
5
.sibling-count-7-2.demo6 li:first-child:nth-last-child(-n+6),
.sibling-count-7-2.demo6 li:first-child:nth-last-child(-n+6) ~ li {
  /* 命中至多包含六项的所有列表 */
  opacity: 1;
}
最后组合这两种技巧来选中包含 4 ~ 6 项的所有列表。
CSS
1
2
3
4
.sibling-count-7-2.demo7 li:first-child:nth-last-child(n + 4):nth-last-child(-n + 6),
.sibling-count-7-2.demo7 li:first-child:nth-last-child(n + 4):nth-last-child(-n + 6) ~ li {
  opacity: 1;
}
3. 满辐的背景,定宽的内容
3.1 margin: auto 方案
实现这种设计的常用方法是使用两层元素:外层实现满辐的背景,内层实现定宽。然后通过 margin: auto 实现水平居中。
margin: auto
The browser selects a suitable margin to use. For example, in certain cases this value can be used to center an element.
HTML
1
2
3
4
5
<div class="wrapper-7-3">
  <div>
    <!-- 内容 -->
  </div>
</div>
CSS
1
2
3
4
5
6
7
8
9
.wrapper-7-3 {
  padding: 10px;
  background: #40a9ff;
}
.wrapper-7-3 div {
  width: 300px;
  margin: auto; /* 自动居中 */
  text-align: justify;
}
3.2 calc() 方案
我们可以使用 calc() 函数计算两侧的 padding 为 calc(50% - 150px) ,最终元素的宽度将为 300px 。
margin: auto
The browser selects a suitable margin to use. For example, in certain cases this value can be used to center an element.
HTML
1
2
3
<div class="fluid-fixed-7-3">
  <!-- 内容 -->
</div>
CSS
1
2
3
4
5
6
7
.fluid-fixed-7-3 {
  padding: 10px; /* 回退方案 */
  padding: 10px calc(50% - 150px); /* 无需指定 width */
  border-radius: 5px;
  color: #f5f5f5;
  background: #40a9ff;
}
4. 垂直居中
在 CSS 中对元素进行水平居中是非常简单的:如果它是一个行内元素,就对它的父元素应用
text-align: center;如果它是一个块级元素,就对它自身应用margin: auto。
实现垂直居中却没那么简单。
4.1 display: table 方案
垂直居中:
尺寸不确定的元素
HTML
1
2
3
4
5
6
<div class="container-7-4">
  <div class="center">
    <p>垂直居中:</p>
    <p>尺寸不确定的元素</p>
  </div>
</div>
CSS
1
2
3
4
5
6
7
8
.container-7-4 {
  display: table;
}
.container-7-4 .center {
  display: table-cell;
  text-align: center;
  vertical-align: middle;
}
4.2 position: absolute 方案
垂直居中:
尺寸确定的元素
CSS
1
2
3
4
5
6
7
8
9
10
11
12
13
.container-7-4 {
  position: relative;
}
.container-7-4 .center {
  position: absolute;
  left: 50%;
  top: 50%;
  margin-left: -75px; /* 150 / 2 = 75 */
  margin-top: -55px; /* 110 / 2 = 55 */
  width: 150px;
  height: 110px;
  box-sizing: border-box;
}
上述方案最大的局限在于当居中元素的宽高不固定时,我们就无法通过 margin-left 和 margin-top 来居中了。
但是我们可以通过 transform: translate(-50%, -50%) 来居中。因为 translate() 和其他大多数属性不一样,它的百分比是根据自身的宽高来计算的。
垂直居中:
尺寸不确定的元素
CSS
1
2
3
4
5
6
7
8
9
10
.container-7-4 {
  position: relative;
}
.container-7-4 .center {
  position: absolute;
  left: 50%;
  top: 50%;
  transform: translate(-50%, -50%);
  box-sizing: border-box;
}
4.3 display: flex 方案
垂直居中:
尺寸不确定的元素
CSS
1
2
3
4
5
6
.container-7-4 {
  display: flex;
}
.container-7-4 .center {
  margin: auto;
}
注: 当我们使用 Flexbox 时,margin: auto 会让元素在水平和垂直方向居中。
5. 紧贴底部的页脚
紧贴底部的页脚(sticky-footer)的设计如下:当内容高度不够撑满其父元素时,页脚位于视口的最底部,而不是紧跟在内容的下方。
5.1 min-height 方案
我们给 <main> 元素设置一个 min-height,其值为父元素高度减去 <header> 、 <footer> 和外边距的值。
Main
点击更改高度
HTML
1
2
3
4
5
6
7
8
<div class="container-7-5 plan1">
  <header>Header</header>
  <main>
    <p>Main</p>
    <p>点击更改高度</p>
  </main>
  <footer>Footer</footer>
</div>
CSS
1
2
3
.container-7-5.plan1 main {
  min-height: calc(100% - 90px);
}
5.2 Flexbox 方案
我们给容器元素设置 flex 布局,并把主轴的方向设为垂向。
然后再给 <main> 设置如下属性:
flex-grow: 1;: 当flex元素高度之和小于容器时,<main>自动放大直至撑满容器。flex-shrink: 0;: 当flex元素高度之和大于容器时,<main>元素不会收缩。
Main
点击更改高度
CSS
1
2
3
4
5
6
7
8
.container-7-5 {
  display: flex;
  flex-direction: column;
}
.container-7-5 main {
  flex-grow: 1;
  flex-shrink: 0;
}
注: flex 是 flex-grow flex-shrink flex-basis 的简写属性,默认值为 0 1 auto 。当我们设置 flex: 1 时,flex-grow 将被设为 1 。